Building a Scratch Everywhere App (Bundled with Your Scratch Project)
- Last updated: April 25, 2026 for Beta Version 40
- Created/edited by: Br0tcraft, Dogo6647, Starlii10
WARNING
Please read this guide carefully at least once before starting. Understanding the full process first will save you time and avoid most common mistakes.
If you run into issues, or if you find errors in this tutorial, please reach out to us on our Discord server https://discord.com/invite/Y2gf5vZHpJ
Introduction
This guide will show you how to bundle your Scratch project into a standalone app using Scratch Everywhere (SE!).
Once built, your project will behave like a native app on supported platforms such as 3DS, Wii U, GameCube, PS4, Vita, and more!
To make things easier and avoid installing tons of dependencies manually, we’ll use Docker. Think of it as a small, isolated Linux system that automatically sets everything up for you.
What You’ll Need
- A working Docker installation
- The Scratch Everywhere source code (from GitHub)
- Your Scratch project (.sb3)
- A bit of patience. Compiling can take several minutes.
Step 1: Install Docker
There are two main methods of installing Docker: Docker Desktop and the standalone Docker engine, known as Docker CE. This guide will use Docker Desktop on Windows and macOS, and Docker CE on Linux.
Docker Desktop (Windows/macOS)
- Visit the Docker website
- Click "Download Docker Desktop"
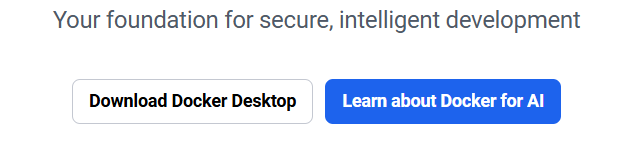
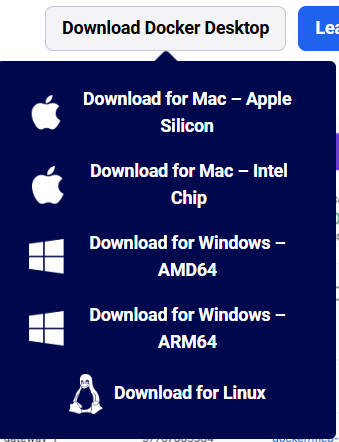
- Choose your operating system.
NOTE
Make sure to select the correct installer for your CPU:
- ARM / aarch64 → use the ARM installer
- amd64 / x86 → use the amd64 installer
- Download the installer, run it, and follow the on-screen instructions.
- Once installed, launch Docker Desktop to make sure it's running.
Docker CE (Linux)
Follow the instructions found in the Docker documentation on how to install Docker CE for your Linux distribution.
Step 2: Download Scratch Everywhere!
- Visit the official Scratch Everywhere repository:
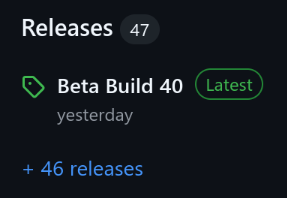
https://github.com/ScratchEverywhere/ScratchEverywhere - Go to the Releases section:
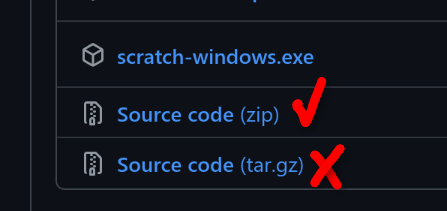
- Download "Source code (zip)"
- Extract this ZIP to a convenient location, for example, near your Scratch project.
Step 3: Prepare Your Scratch Project
- Rename your Scratch project’s file extension from
.sb3→.zip
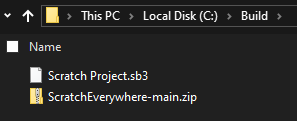
Example: Scratch Project.sb3 → Scratch Project.zip - Right-click both ZIP files (the Scratch Everywhere one and your project) and select “Extract All...”

- You should now have extracted folders that look something like this:

- You can delete the original
.zipfiles, we don’t need them anymore.
Step 4: Set Up the Project Folder Structure
- Open the folder: ScratchEverywhere-main/ScratchEverywhere/
- Inside, create a new folder named
romfs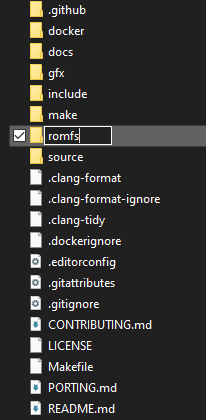
- Copy your extracted Scratch project folder into
romfs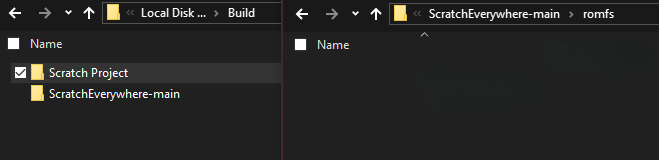
- Rename your project folder to
project(all lowercase!)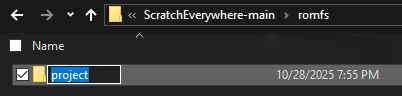
Your structure should now look like this:
ScratchEverywhere-<version>/
└── ScratchEverywhere-<version>/
   ├── romfs/
   │   └── project/
   ├── gfx/
   ├── make/
   ├── docker/
   └── ...
Step 5: Customize Icons and Graphics
Inside the gfx folder, you’ll find all the platform-specific icons and graphics.
For example, the icon.png file is used as the app icon on consoles like the 3DS.
- You can replace these images with your own graphics.
- ⚠️ Do not change the image sizes, names, or extensions.
The images must keep their exact dimensions and same filenames (e.g.icon.png). - GIMP is great for these kinds of things, but you can use any image editing software you want.
- For the Vita's images, you will neet to get
pngquantand run:in a terminal (Command Prompt on Windows), then rename output.png to the original image's name. When asked to overwrite it, click "Yes".cd /path/to/gfx/vita/ pngquant --posterize 4 path/to/your_image.png same/path/output.png
You can ignore this step for all other platforms.
To modify banners or special icons, open the subfolder with the name of your target console (e.g., 3ds/, wiiu/, etc.).
Step 6: Change App Information (Title, Description, Author)
- Go back to your main
ScratchEverywhere-mainfolder (the one that containsromfs,gfx,make, etc.). - Find the file named
CMakeLists.txt. Open it in a text editor. - Scroll down until you see these lines:
set(SE_APP_NAME "Scratch Everywhere!" CACHE STRING "Name of the outputed app.")
set(SE_APP_DESCRIPTION "Play Scratch games on anything!" CACHE STRING "Description of the outputed app.")
set(SE_APP_AUTHOR "Scratch Everywhere! Contributors" CACHE STRING "Author of the outputed app.")- Modify these values to fit your project.
- Save and close the file.
Tip
It’s nice (but not required) to mention somewhere in your description (or app/game) that it was built using Scratch Everywhere!.
Step 7: Build the App Using Docker
- Make sure Docker Desktop is running.
- Go back to your main
ScratchEverywhere-<version>folder (the one that containsromfs,gfx,make, etc.). Note the directory shown in the address bar. - Open a terminal (Command Prompt on Windows) and move to the folder you noted down:
cd /path/to/ScratchEverywhere-<version>
Build Commands
After moving to the ScratchEverywhere-<version> folder, type this command into your terminal to build Scratch Everywhere!:
docker build -f docker/Dockerfile.{platform} --target exporter -o . .Replace {platform} with the platform you would like to build for (wiiu, 3ds, pc, etc.).
The build process may take several minutes, depending on your system.
When finished, it should look something like this: 
Common Errors & Fixes
| Error | Cause | Solution |
|---|---|---|
ERROR: failed to build: resolve : CreateFile docker: The system cannot find the file specified. | You’re not in the correct ScratchEverywhere folder, or the docker/ folder is missing or empty. | Check your folder structure or re-download Scratch Everywhere. |
ERROR: Error response from daemon: Docker Desktop is manually paused. | Docker is paused. | Click the 🐋 Docker icon in your system tray → select Resume or Restart. |
ERROR: error during connect: Head "http://%2F%2F.%2Fpipe%2FdockerDesktopLinuxEngine/_ping": ... The system cannot find the file specified. | Docker isn’t running. | Open Docker Desktop and wait until it’s fully started. |
Step 8: Find Your Compiled Game
After a successful build, your exported files will appear directly in the ScratchEverywhere folder.
| Platform | File Types |
|---|---|
| 3DS | .3dsx and .cia |
| Wii U | .rpx and .wuhb |
| Vita | .vpk |
| PS4 | .pkg |
| Switch | .nro |
| PSP | .zip |
| DS | .nds |
| GameCube/Wii | .dol |
| webOS | .ipk |
| PC | scratch-* (Unix/macOS) .exe (Windows) |
You can now copy these files to your console and install or launch them like any other homebrew app!
Final Notes
Congratulations, you’ve successfully built your own standalone Scratch app using Scratch Everywhere!
If something doesn’t work:
- Double-check folder names and paths
- Make sure Docker is running and not paused
- Re-download the latest version of Scratch Everywhere!
And don’t hesitate to share your results or ask for help in our Discord server.
We love seeing new projects from the community!